Any information contained on this Website is not legal advice and should not be treated as such. You should always contact an attorney for help with your specific legal needs and issues. We may also earn a commission when you click links to our partners and purchase goods or services. For more information, read our Disclaimers Policy.
Introduction
In early 2022, a German court ruled that websites that embed fonts from Google servers violate GDPR (General Data Protection Regulation) and could be subject to fines. In this guide, we'll cover how to locate and remove Google Fonts from your Webflow site. There are multiple ways that Google Fonts can be loaded in a Webflow site, so it's important to do a thorough check to make sure you remove all connections to Google Fonts. Once these connections are removed, Google Fonts should stop loading on your site.
Step 1: Check the Fonts tab
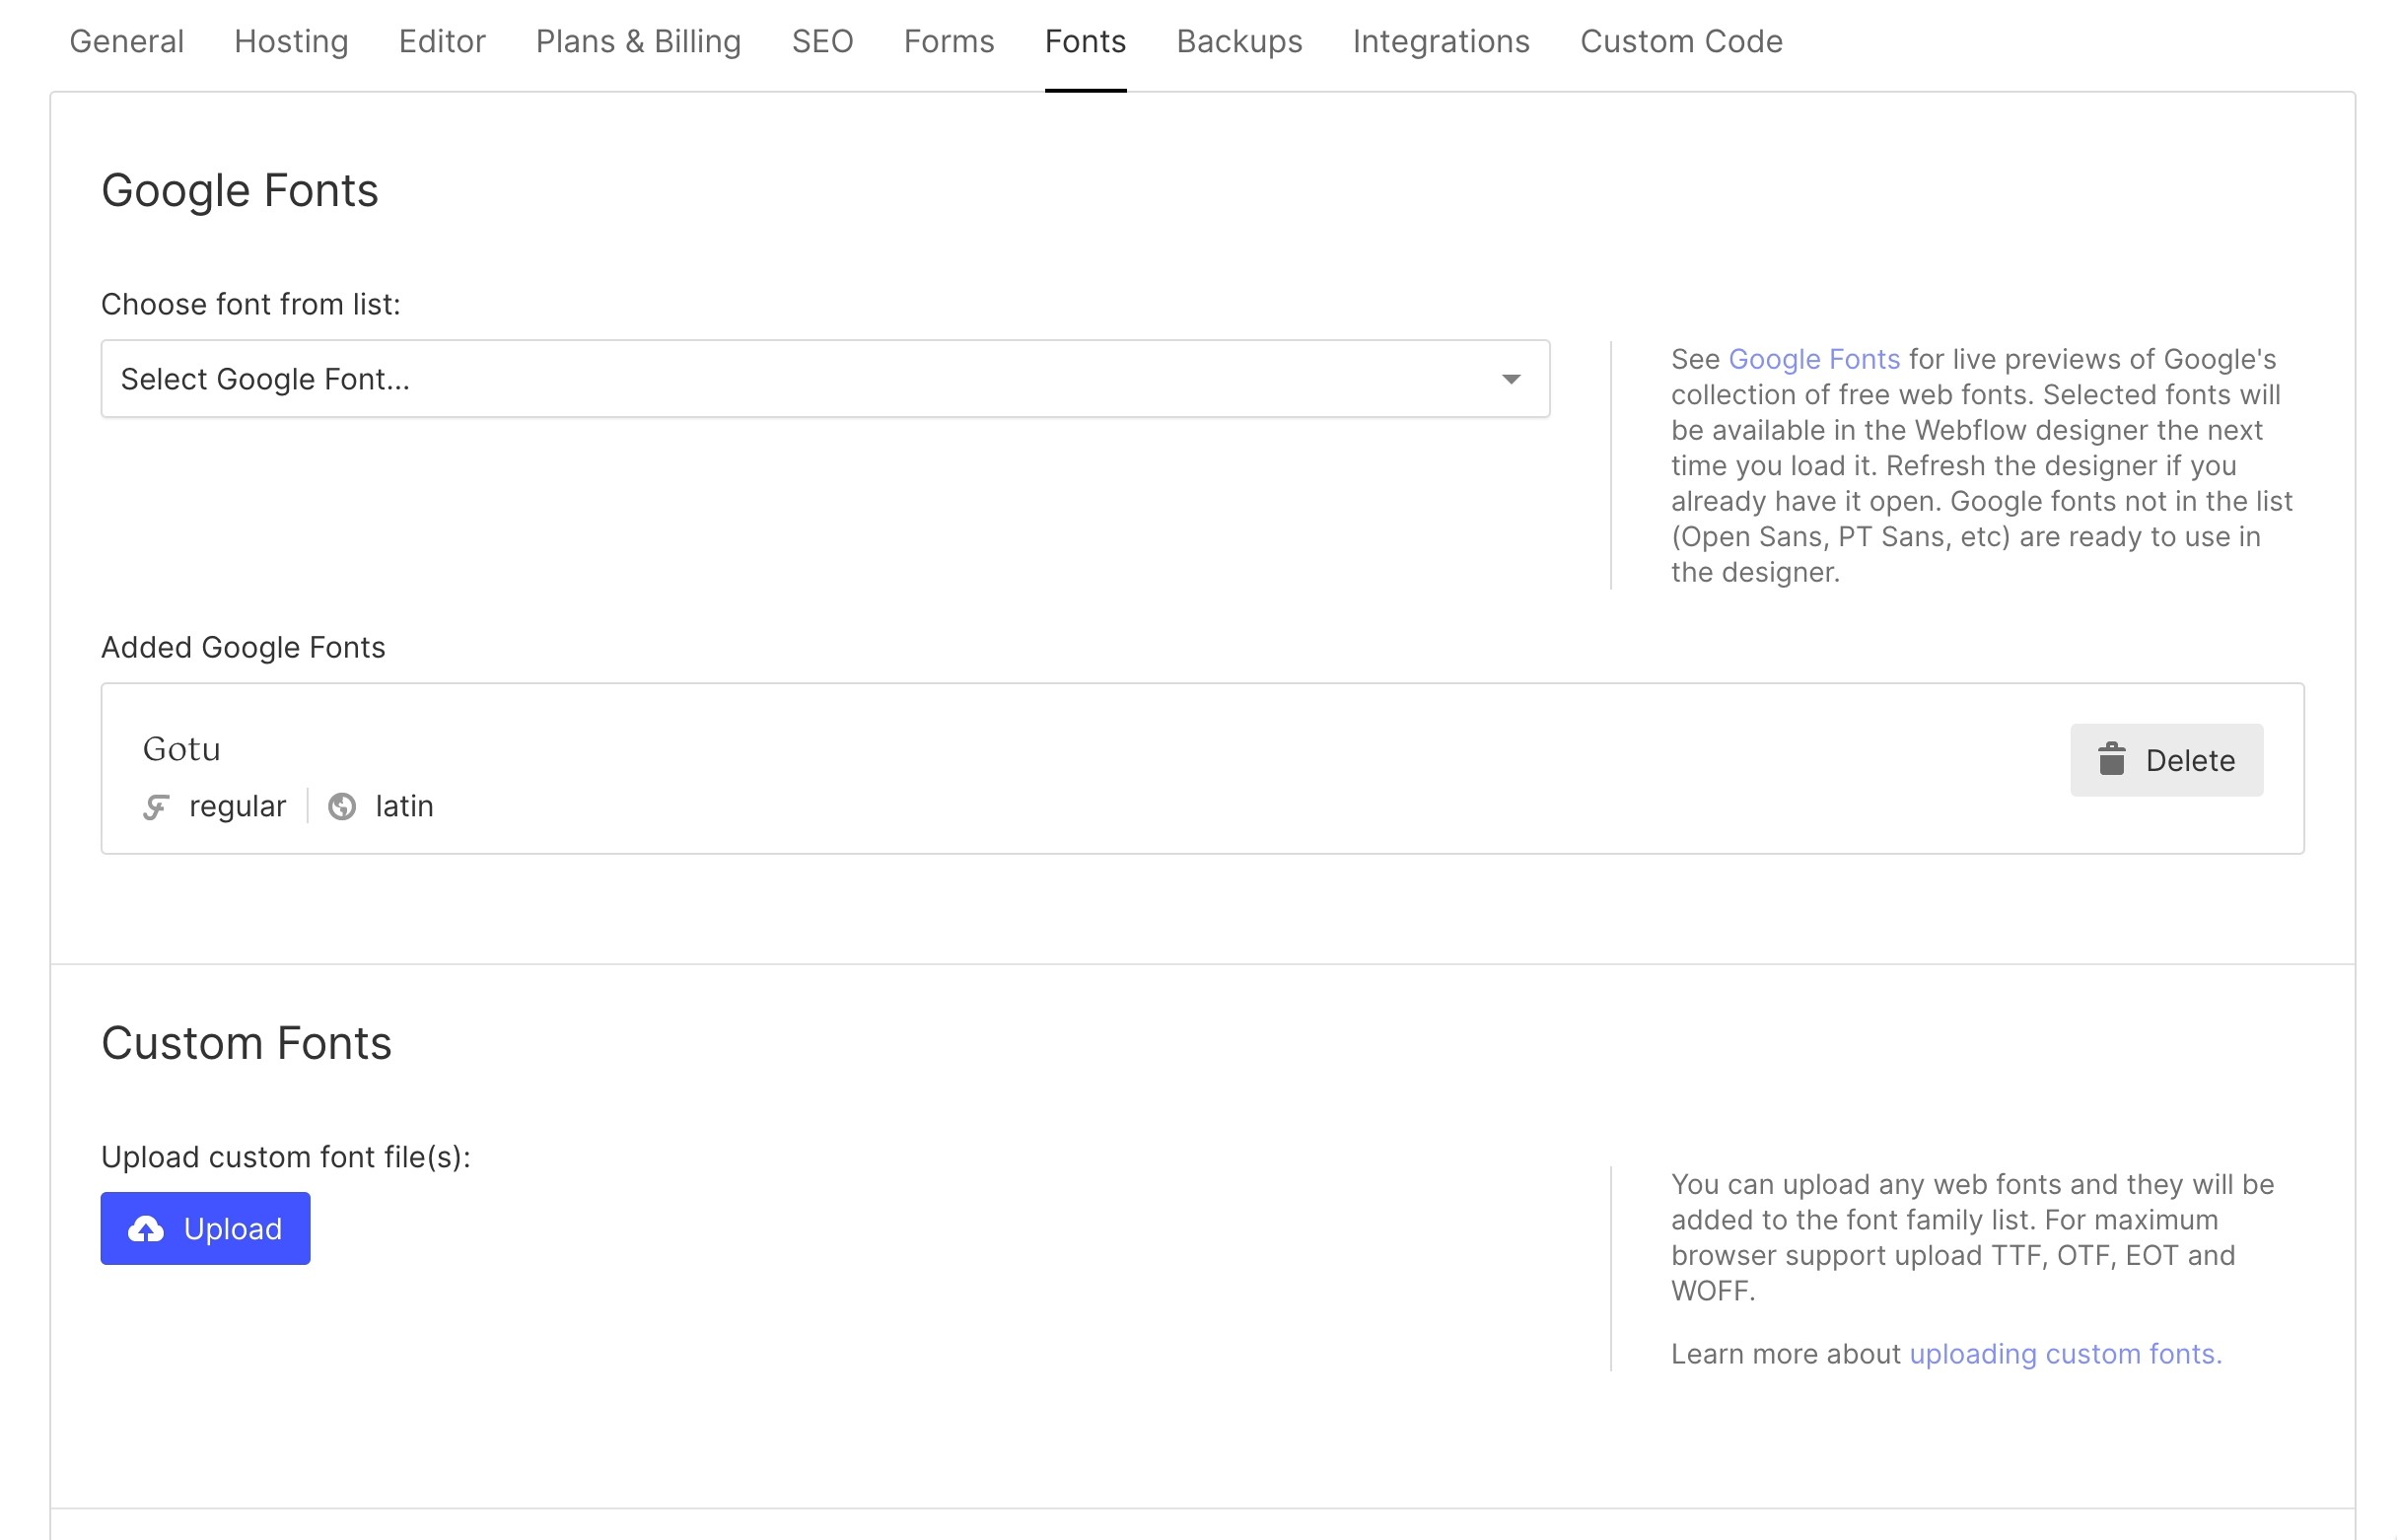
The first place to check for Google Fonts removal is the Fonts tab in your Site Settings. If you have any Google Fonts listed under the Google Fonts section, you'll want to delete them and republish the site.

Step 2: Open the Browser Console and check what fonts are loading from Google
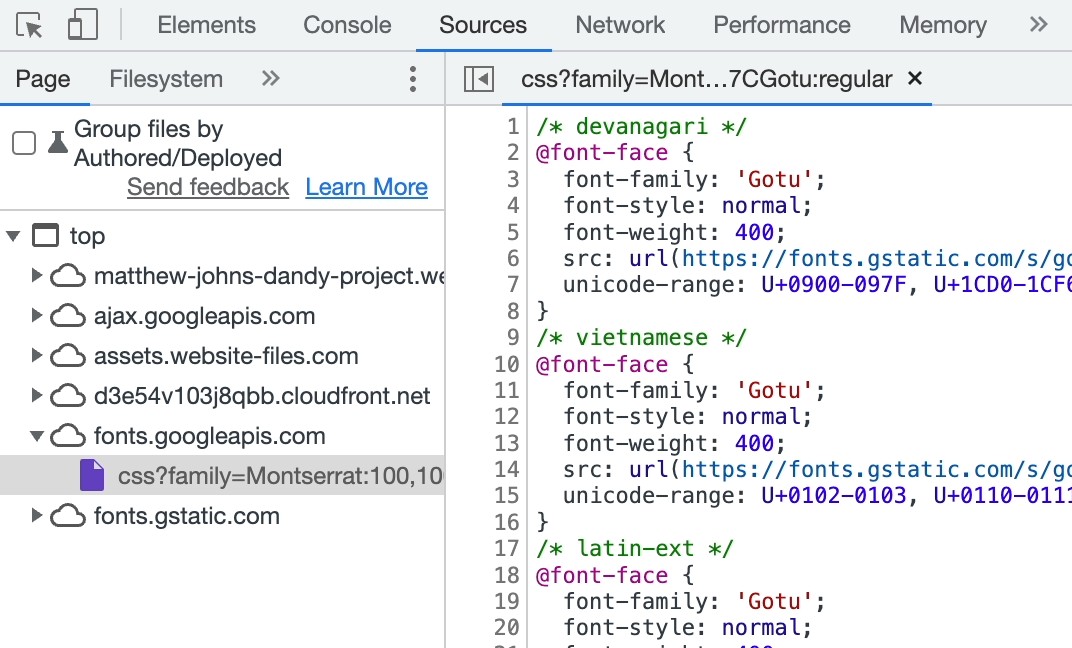
To definitively find which fonts are loading from Google, visit your live site at your webflow.io or custom domain and open the browser console by right clicking on the page and choosing "Inspect". You'll then want to go to the "Sources" tab of the browser console and find the Google Fonts source if present. Once you find Google Fonts, expand the folder and view the file within. From there you can view all the fonts that are loading from Google Fonts. Take note of each of the listed fonts for the next step.

Step 3: Open your CSS file from the console and locate which classes are using those fonts
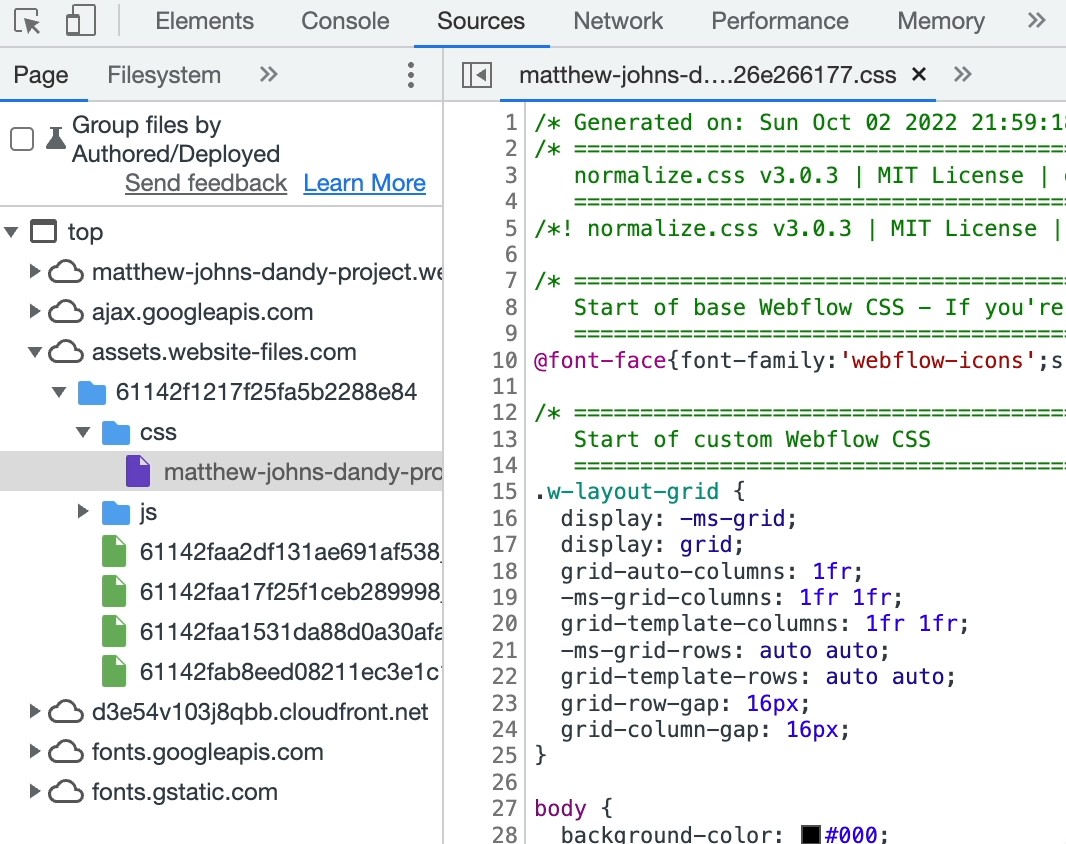
Next you'll want to find the source that starts with something like "assets.website-files" or "assets-global.website-files" and open that. From there, you should be able to find your site's CSS file. Select the CSS file and use the find tool to search for instances of each of the Google Fonts and take note of the CSS classes that are using them. You can open the find tool by pressing "CTRL + F" on Windows or "CMD + F" on Mac.

Step 4: Search for those classes in Webflow using the Style Manager
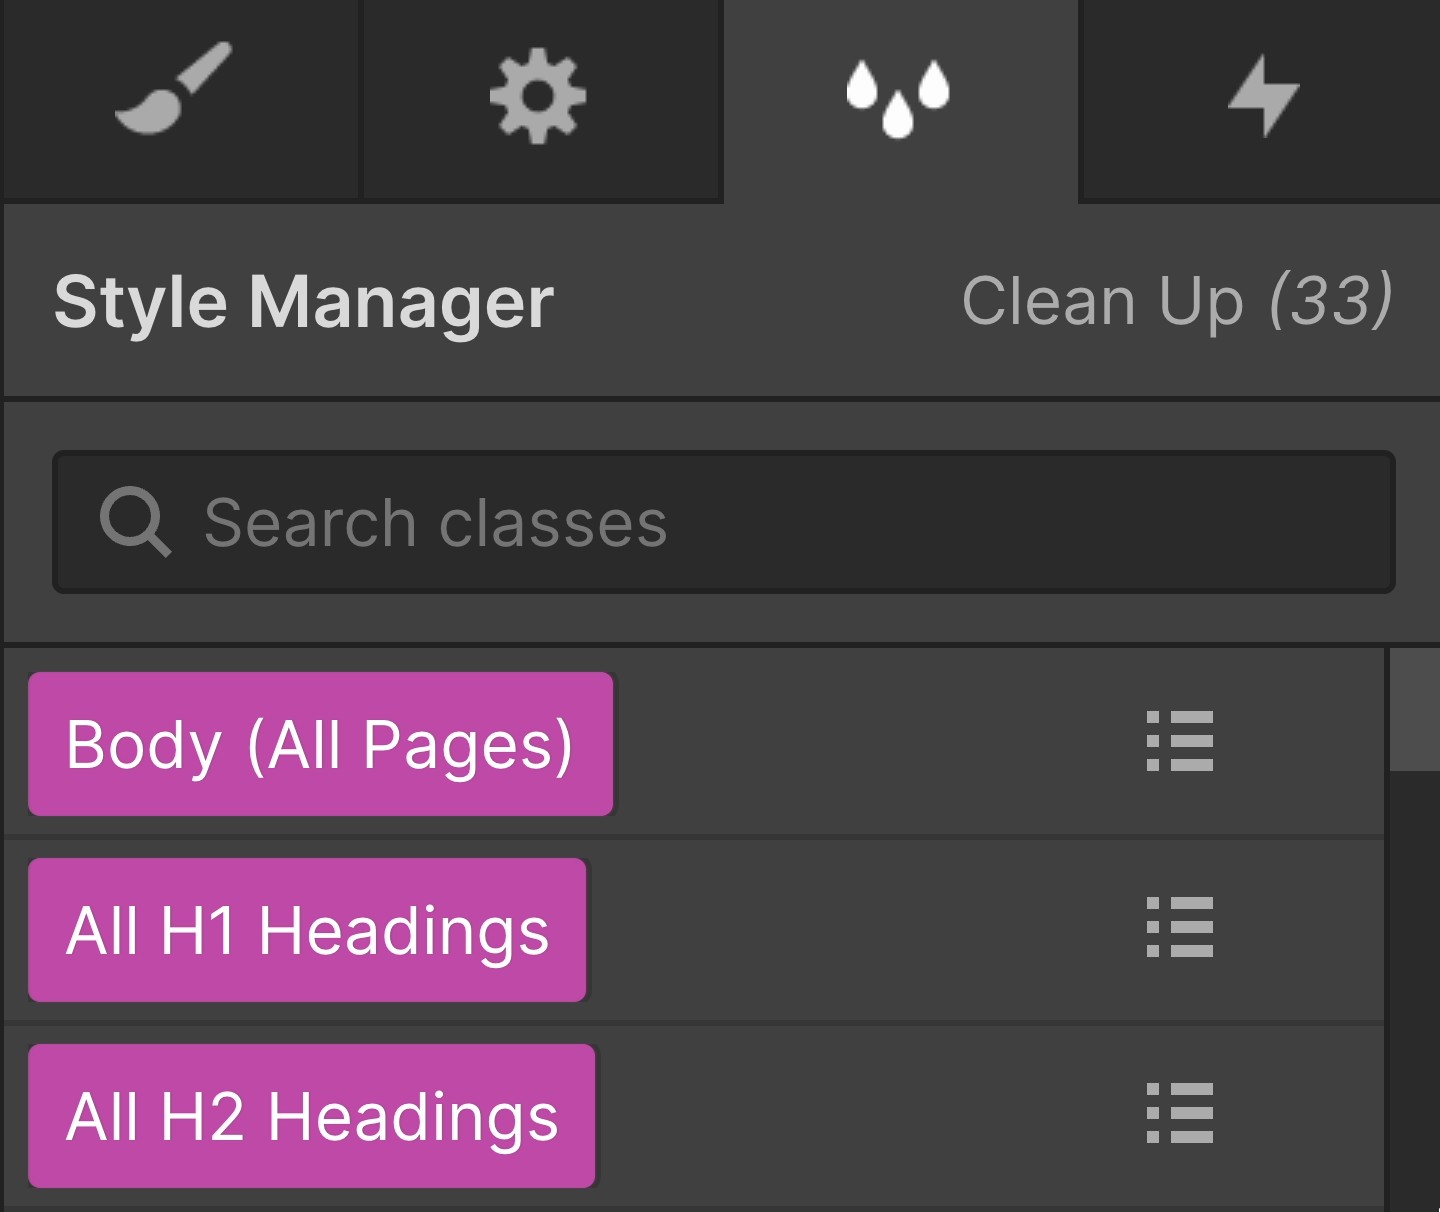
Open the Designer view of your Webflow site and open the Style Manager on the right. From there, you can search for each of the CSS classes you took note of in the last step. You can also search the font names there to find classes and elements using those fonts.

Step 5: Locate each class and modify or delete it
Find each class that is using a Google Font in the Style Manager and either modify the font or delete the class. If you click on the icon next to the class in the Style Manager, you can view what pages and elements have that class and navigate to them to change the class properties. Be sure to double check all breakpoints for each class. In some cases, you may have to delete the class and create a new one to replace it.
Step 6: Publish the site and check if Google Fonts are still loading
Once you've removed all Google Fonts in the Designer, publish the site and check the Sources tab again to see if Google Fonts is still loading as a source. If they are still loading, check your CSS file again. Some classes might still have them even if it isn’t shown in the Designer. In these cases, you may have to check other breakpoints or fully delete those classes.
Step 7: Check if you’re using a custom code embed or Maps element that could be calling Google Fonts
In some cases, you may have embedded content that is calling Google Fonts like a third-party tool or Google Maps embed. In these cases, you would have to delete the embedding content to stop Google Fonts from loading.
Conclusion
We hope this guide was helpful. If you have any questions or need help removing Google Fonts from your Webflow site, feel free to contact us. We would be happy to take a look at your site and help you remove them. We charge $95/hour for Webflow services, and Google Fonts removal usually takes less than one hour but can be longer for more complex sites.


